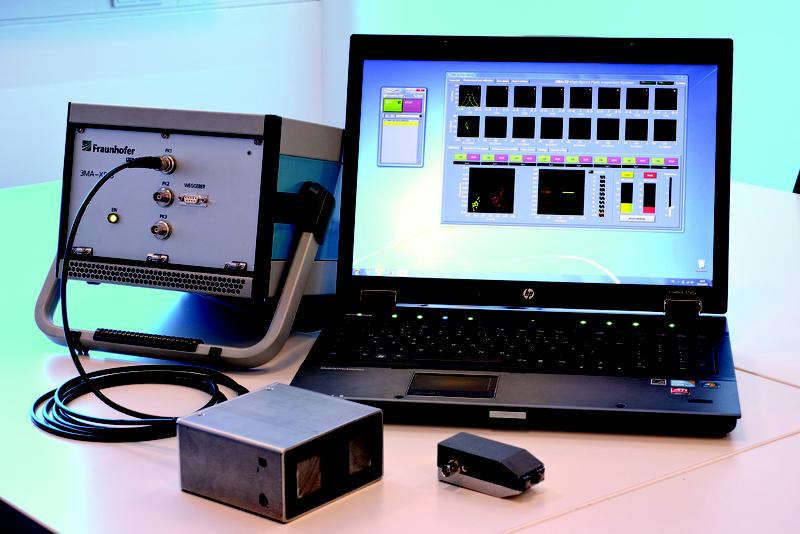
High-Speed Micromagnetic Characterization of Ferromagnetic Materials

3MA-X8 System
Fraunhofer IZFP
Iron and steel parts, as well as components used in machines, vehicles and plant engineering are often made of ferromagnetic materials. These components are heat-treated and machined in order to create the desired functional characteristics.
Determination of the quality of the surface layer properties requires suitable inspection methods. Micromagnetic methods offer a fast and nondestructive way to characterize and analyze materials properties during or directly after a production step with up to 100 percent process integration.
3MA is an acronym for “micromagnetic multiparameter, microstructure and stress analysis”. The 3MA measuring systems of Fraunhofer IZFP determine, in fractions of a second, different material properties, e.g. hardness, case hardening depth.
In addition, a variety of other magnetic parameters is determined which reflect different material properties and stress states. The 3MA method determines the relationship between the magnetic characteristics measured and desired result parameters (e.g. hardness, case depth, tensile strength, yield strength, residual stresses) on the basis of a defined calibration sample set.
This is done using mathematical-statistical tools such as pattern recognition and regression analysis. Finally, an application of the calibration in order to inspect the calibrated component, finished and semi-finished product types is possible.
The 3MA-X8 measuring system implements the 3MA approach with particular emphasis on the possibility of a simple calibration, very high measuring speed and variable sensor design. In addition, simultaneous operation of up to eight sensors is possible with a device to cover several measuring positions or accelerate surface scans.
The application potential of this 3MA variant is discussed in this contribution regarding different application examples, and a comparison with the original 3MA approach is provided.


